|
In this step of the project you will grow native northern red oak or sugar maple seedlings into saplings that are ready to live outdoors! You can grow white oaks the same way as northern red oaks.
You can complete these steps in the classroom or at home (or both!). Seeds to Saplings recommends that students try to grow four of their chosen tree species, since not all seedlings will survive. |
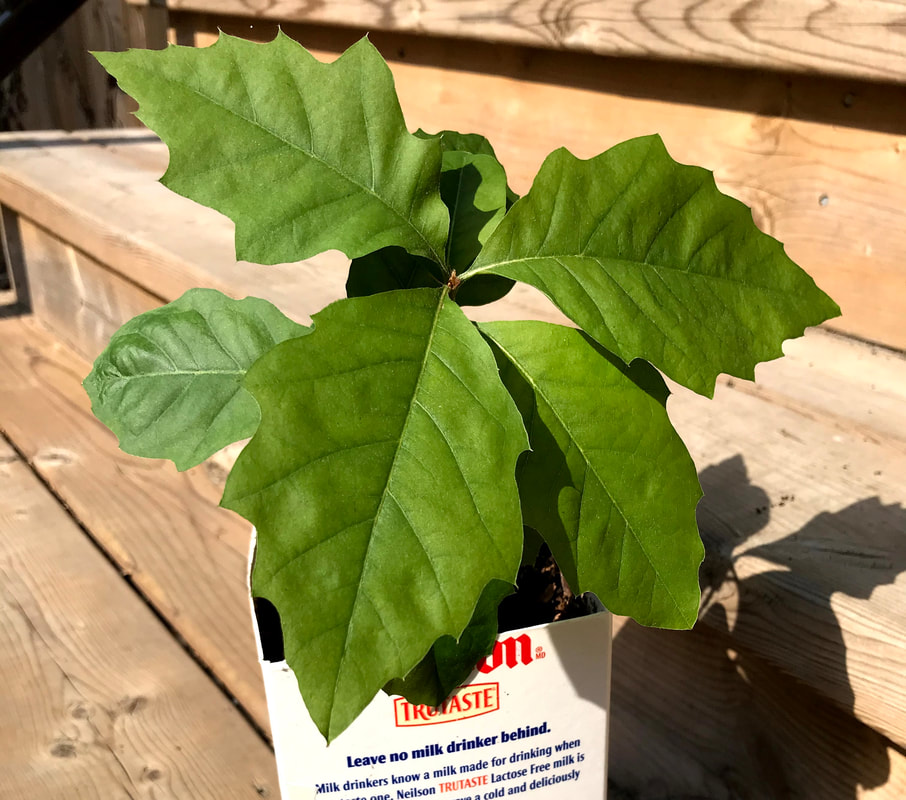
Three month old northern red oak sapling grown in soil.
|
Use the following links to skip to a section on this page:
Growing northern red oak in soil
Growing northern red oak hydroponically
Transplanting northern red oak to a larger pot
Growing sugar maple
Growing northern red oak in soil
Growing northern red oak hydroponically
Transplanting northern red oak to a larger pot
Growing sugar maple
BEFORE YOU START: Set up A research log
For all saplings that you attempt to grow, please help us accumulate data on your growing success by setting a simple table with the following headings that you could easily fill in once, at the same time, each week:

|
There are two options for growing northern red oak acorns: in soil or in water (hydroponically). We recommend that students grow two acorns in each medium. One of each kind can be grown at home and one of each in the classroom to save space.
|
Photo by Andrew Budziak
|
Growing Acorns in Soil
Video INstructions:
|
|
|
Step 1: Materials
- Empty 2 L cardboard/wax drink cartons (e.g. for milk or juice) or plastic 2 L bottles (use gallon containers if you have room for them)
- Pair of large scissors
- 4 L of all-purpose potting soil
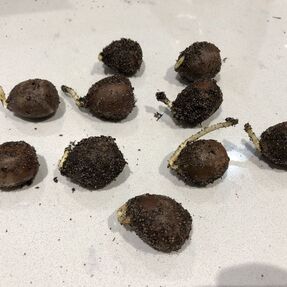
- Stratified northern red oak acorns
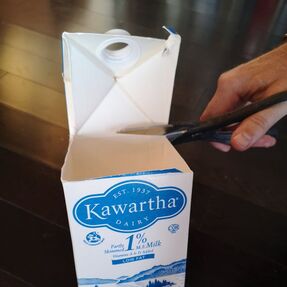
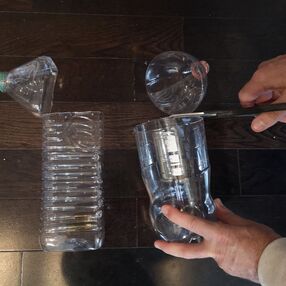
Step 2: Prepare container
Using your scissors, cut off the top part (the angled portion) of an empty 2 L carton or the top of a plastic bottle.

|
|
|
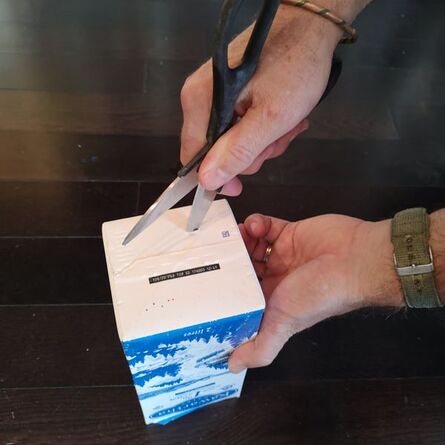
Step 3: Poke holesMake drainage holes with the scissors, poke 6 - 8 holes, approx. 0.5 cm diameter in the bottom of the carton or/and cut corners off.
|
|
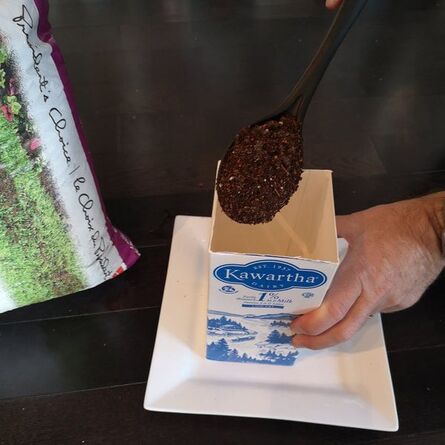
Step 4: Add potting soilAdd moistened potting soil to each empty carton with within approx. 1 cm of the top of the carton. As you put the soil into the carton, you can moisten it a little as you go by adding a little water and stirring with a spoon until the soil is evenly damp. You can help pack and settle the soil down by periodically and firmly tapping the bottom of the carton onto the ground as you fill it. You want the soil compact but not too dense for the growing roots.
|
|
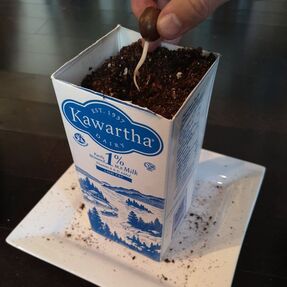
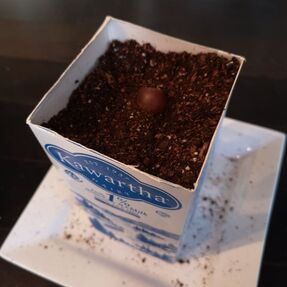
Step 5: PLACE YOUR ACORN
With your finger, scoop out a small hole about 2 cm long by 1 cm wide by 0.5 cm deep. Your germinated acorn should be placed lengthwise into that small hole, with the germinating end (with the small root) angled slightly down. Pack the soil around the acorn so that the top half of the acorn is still visible above the soil.
|
|
|
Step 6: FIND A GOOD SPOT
Place your carton with planted acorn near a south, east or west-facing window - your teacher will indicate the most appropriate place.
Step 7: WATERINGWater the acorn/soil every 2 -3 days. Water the soil until thoroughly moist. Within a few weeks, your acorns should develop a long taproot and will start putting up a shoot. Continue watering for the next few months.
|

|
Step 8: WAIT FOR SPRING
Keep the seedlings indoors until no more frost is forecast. In Toronto, this is usually mid-May. Scroll down to find instructions for how to transition your tree to outdoor living.
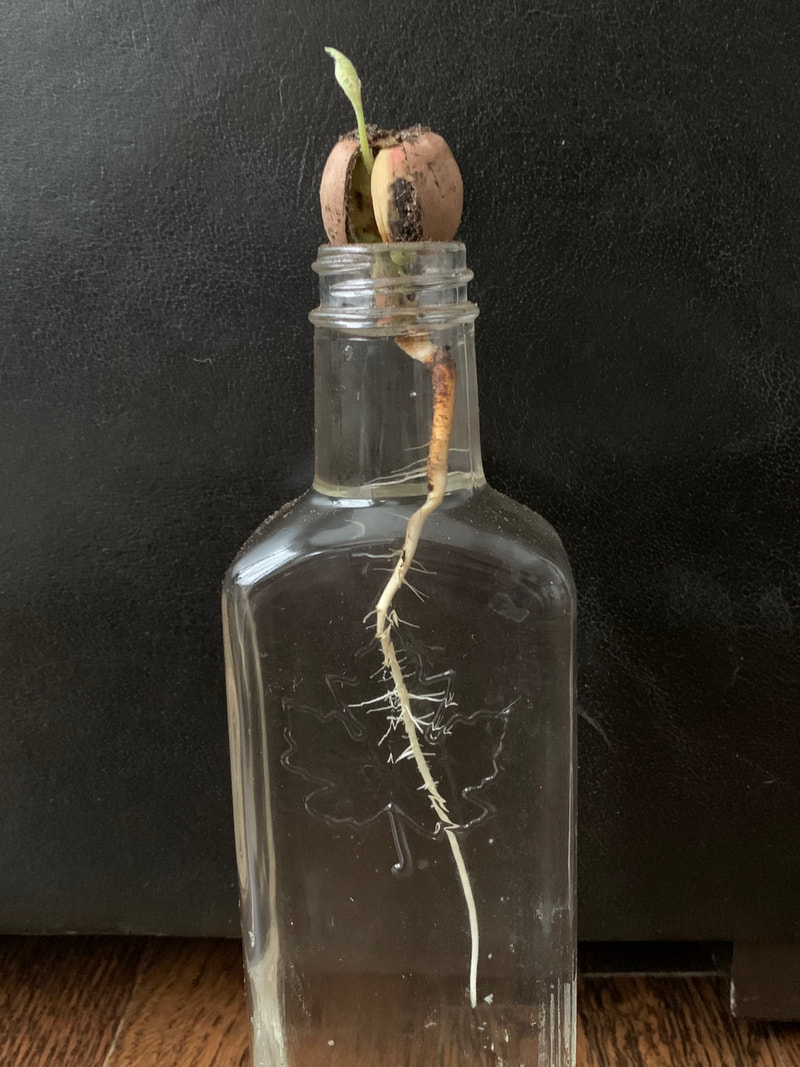
Growing acorns hydroponically means that you will get to see the acorn’s roots develop. Acorns grown this way will need to be transferred to a soil container eventually.


Step 1: Materials
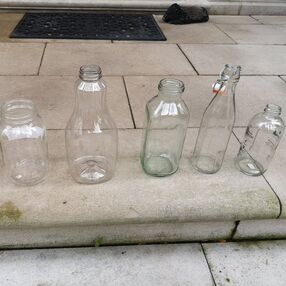
- Empty, clear, recycled glass bottles with labels removed.
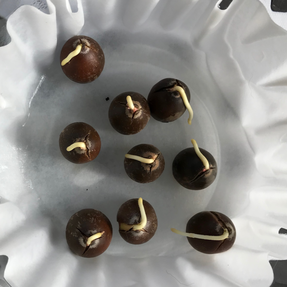
- Germinating northern red oak acorns with a taproot of about 2 cm or longer.
|
|
|
Step 2: Water
Fill up bottle with water to within approximately 2 cm of the top.
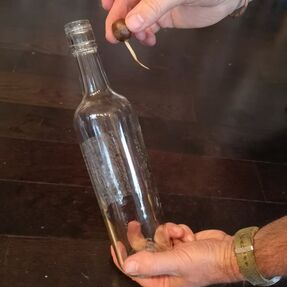
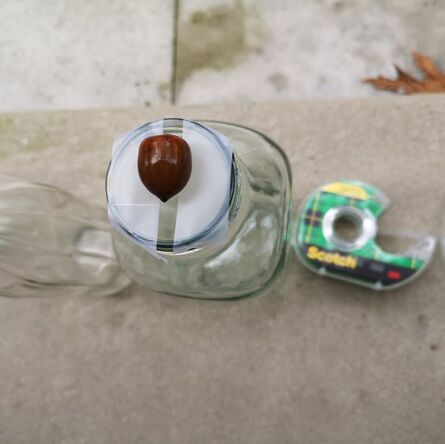
Step 3: Place Your Acorn
Place one acorn root-down at the top of each bottle so that the root reaches into the water. At least 1 cm of air space must be maintained beneath the acorn and water level. Adjust the water level accordingly. If your glass bottle is narrow enough, your germinating acorn should simply rest atop the bottle. If your bottle opening is wider than the acorn, you can place 2 parallel strips of tape across the bottle opening such that the acorn can rest between the strips of tape and still allow the root to reach the water.
|
|
Step 4: Find a good spot
Place your bottle with the acorn atop it near the approved window location in your classroom.
Step 5: top up water
Check and adjust the water level in the bottles every few days if needed - you may need to top it up once or twice a week, depending on the level of evaporation.
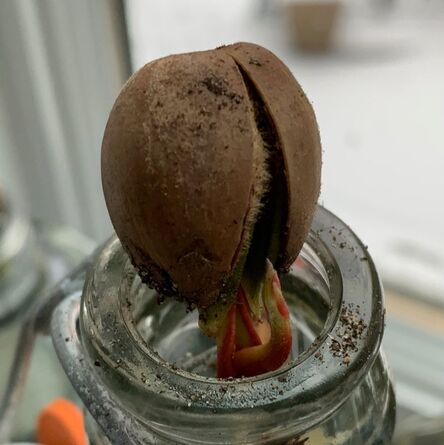
Step 6: Watch it grow!Continue to leave a small airspace of at least 1 cm between the water and the bottom of the acorn. The root should continue to grow down into the water and after a period of time, a shoot should also grow upward.
|
|
Step 7: transfer to soil
After 4-6 weeks transplant your seedling into a container with soil. Watch the video below to learn how to move your hydroponically grown seedlings into a portable soil container.
|
|
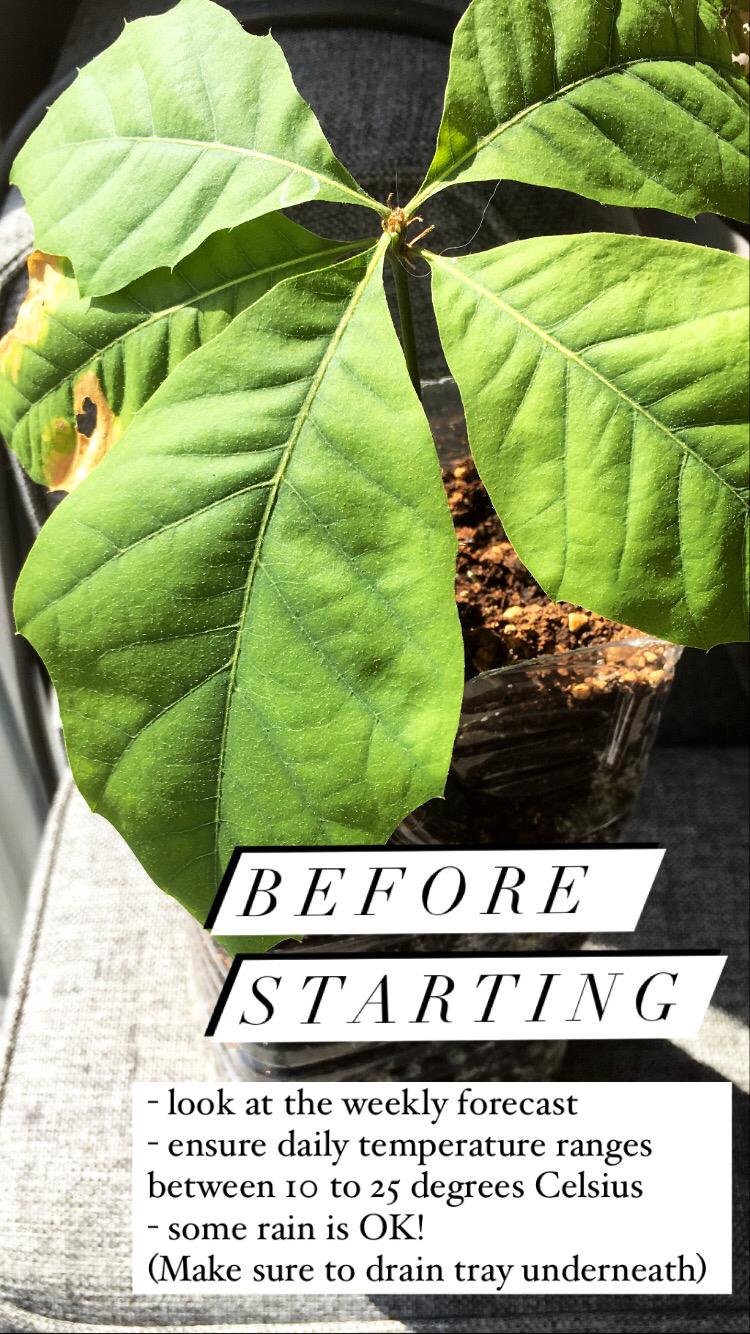
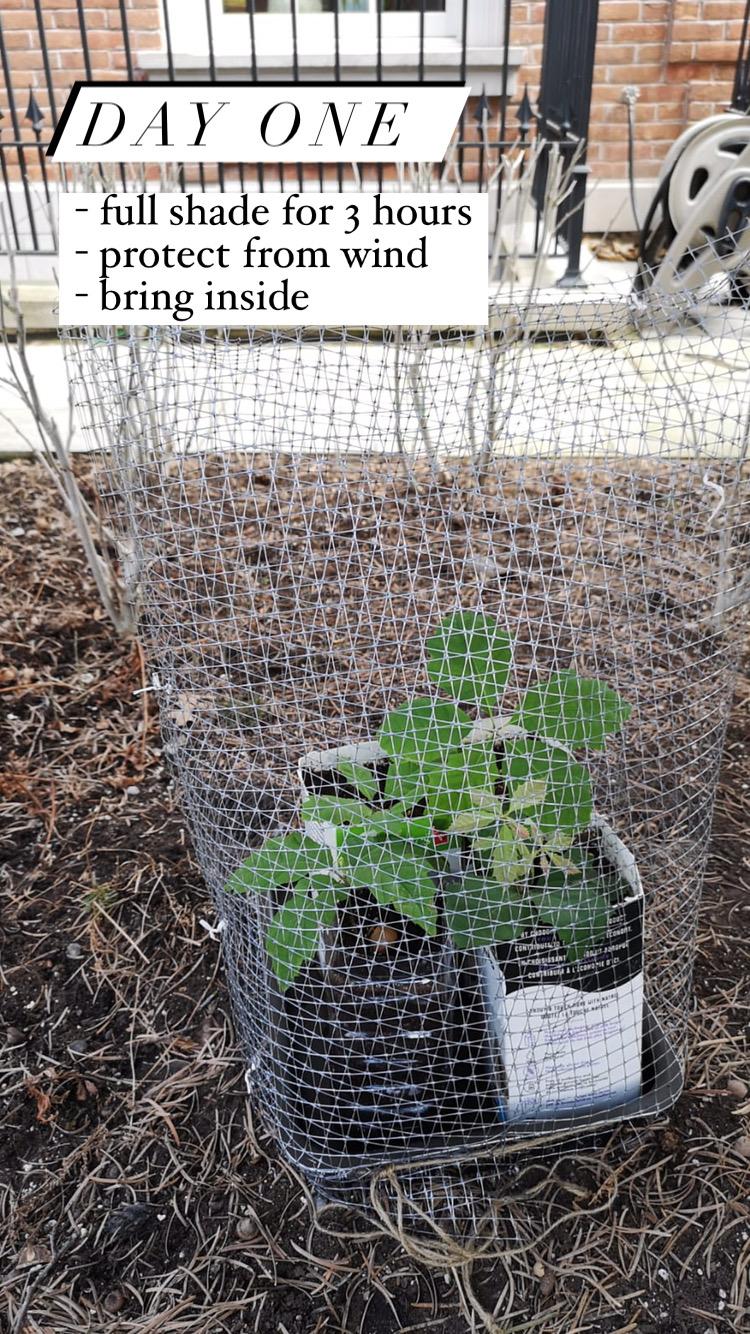
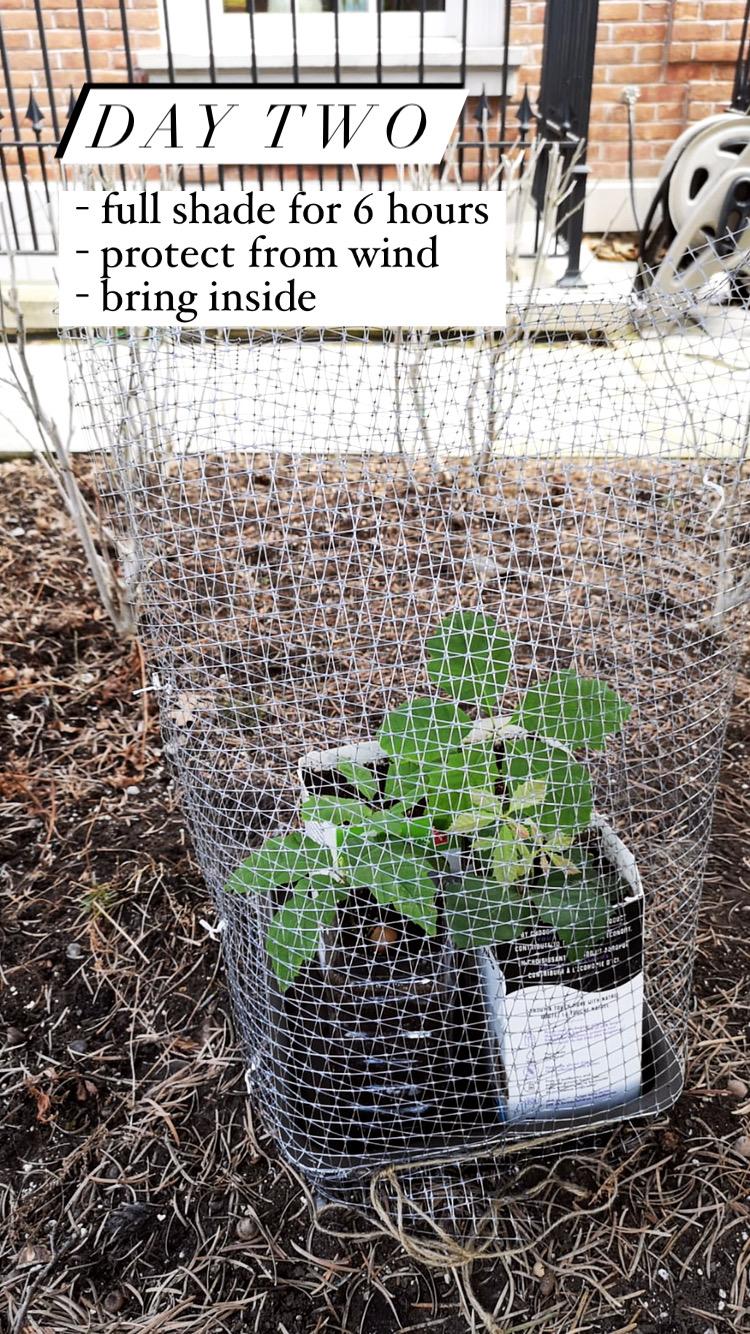
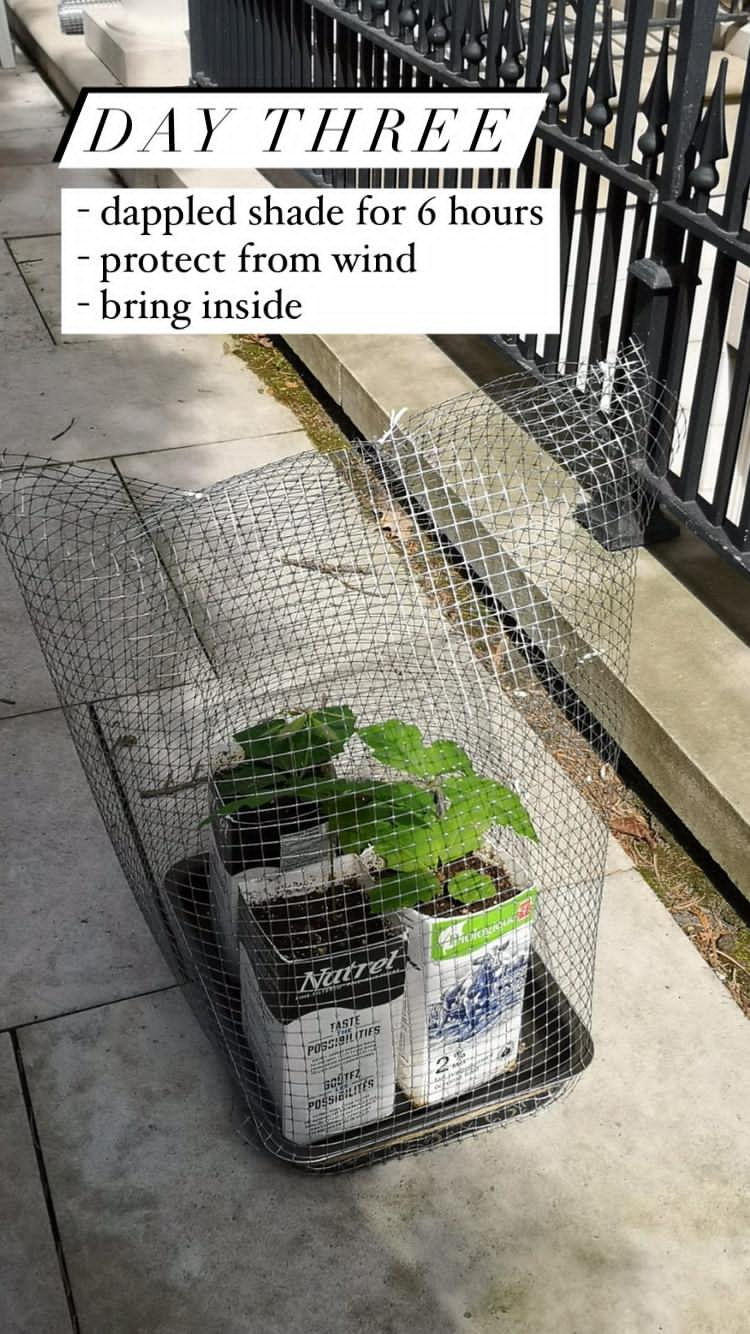
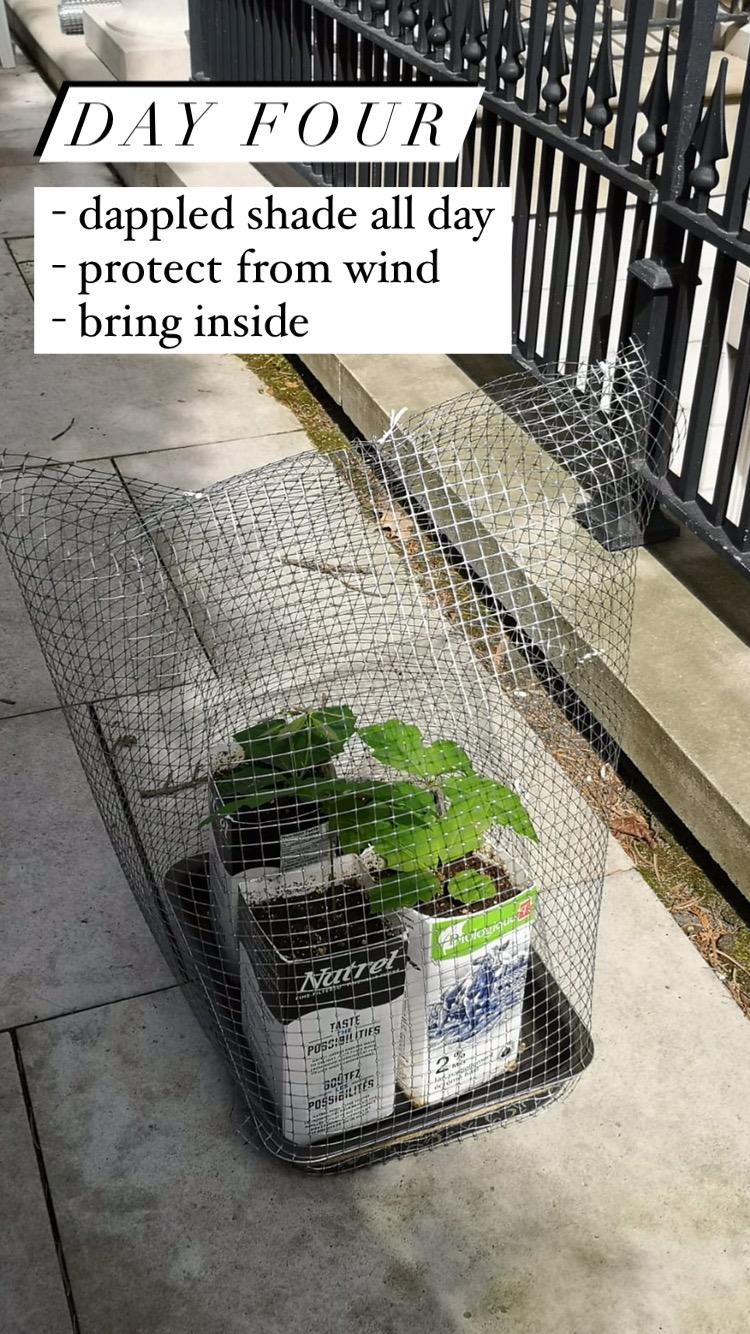
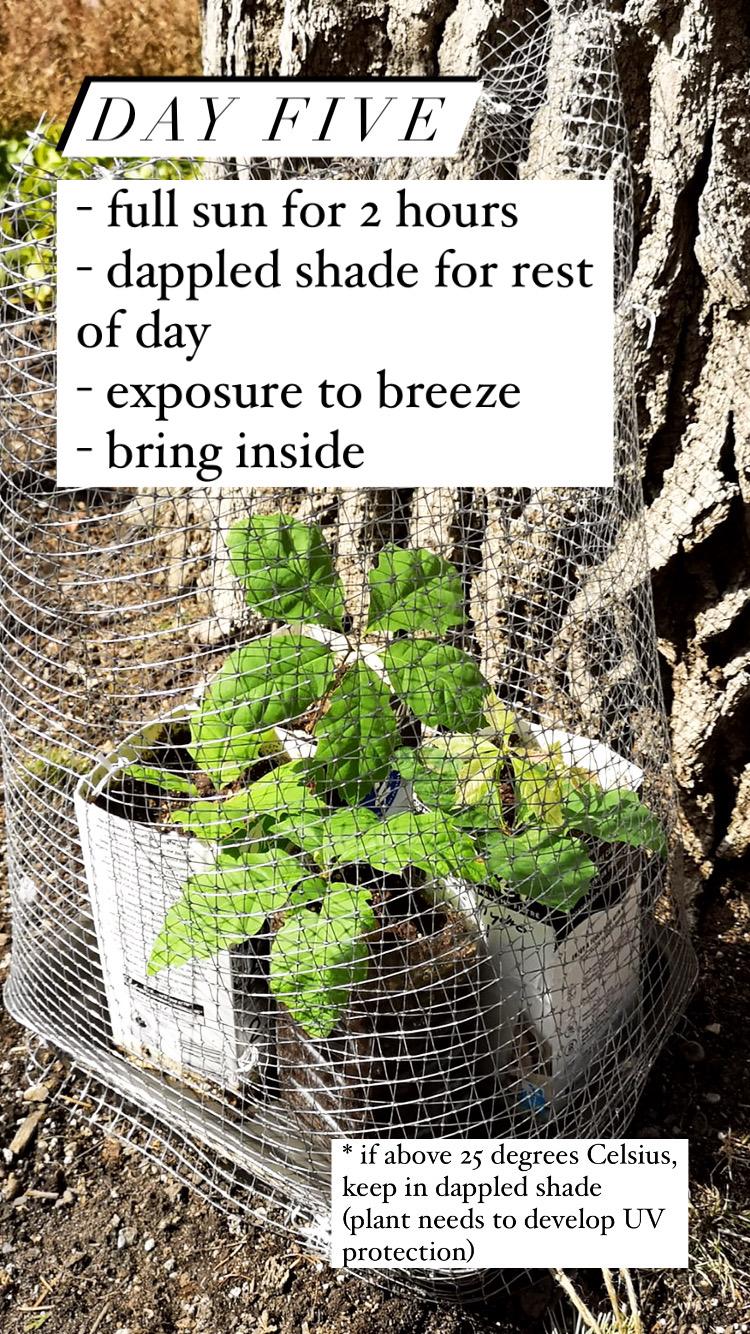
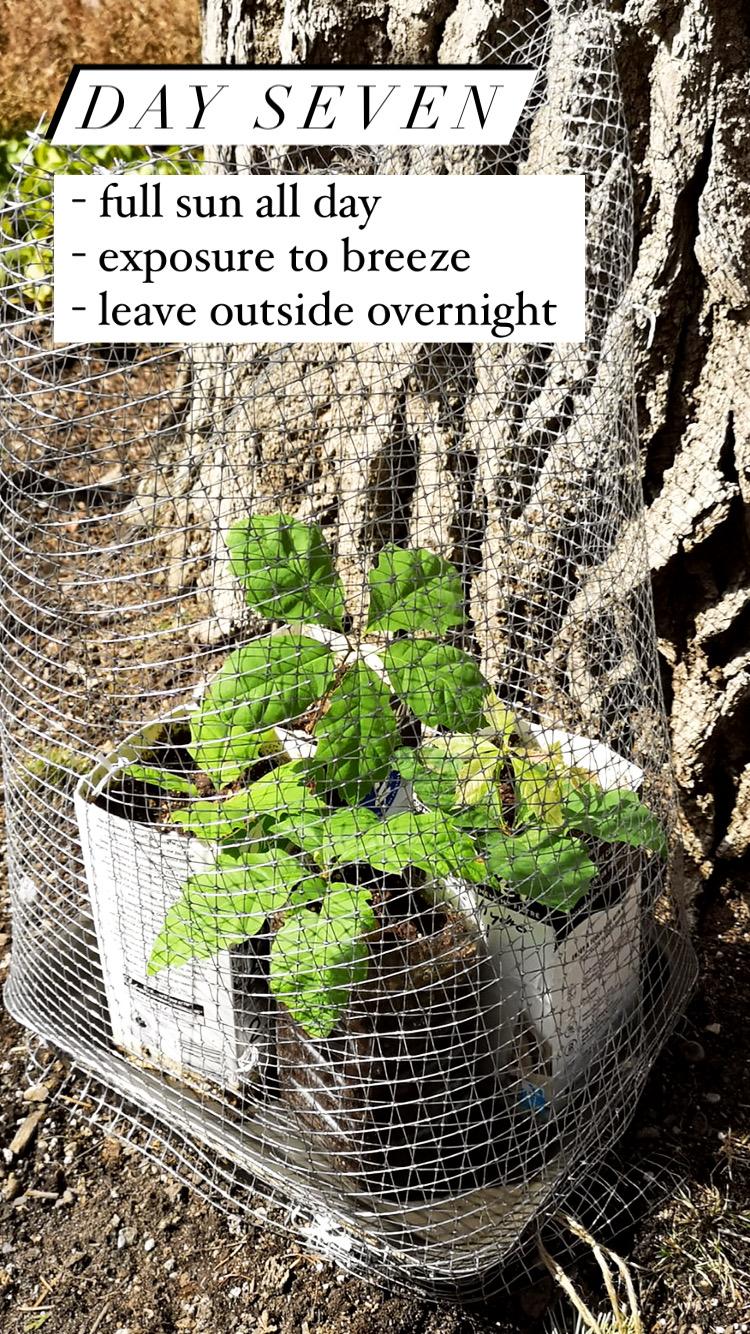
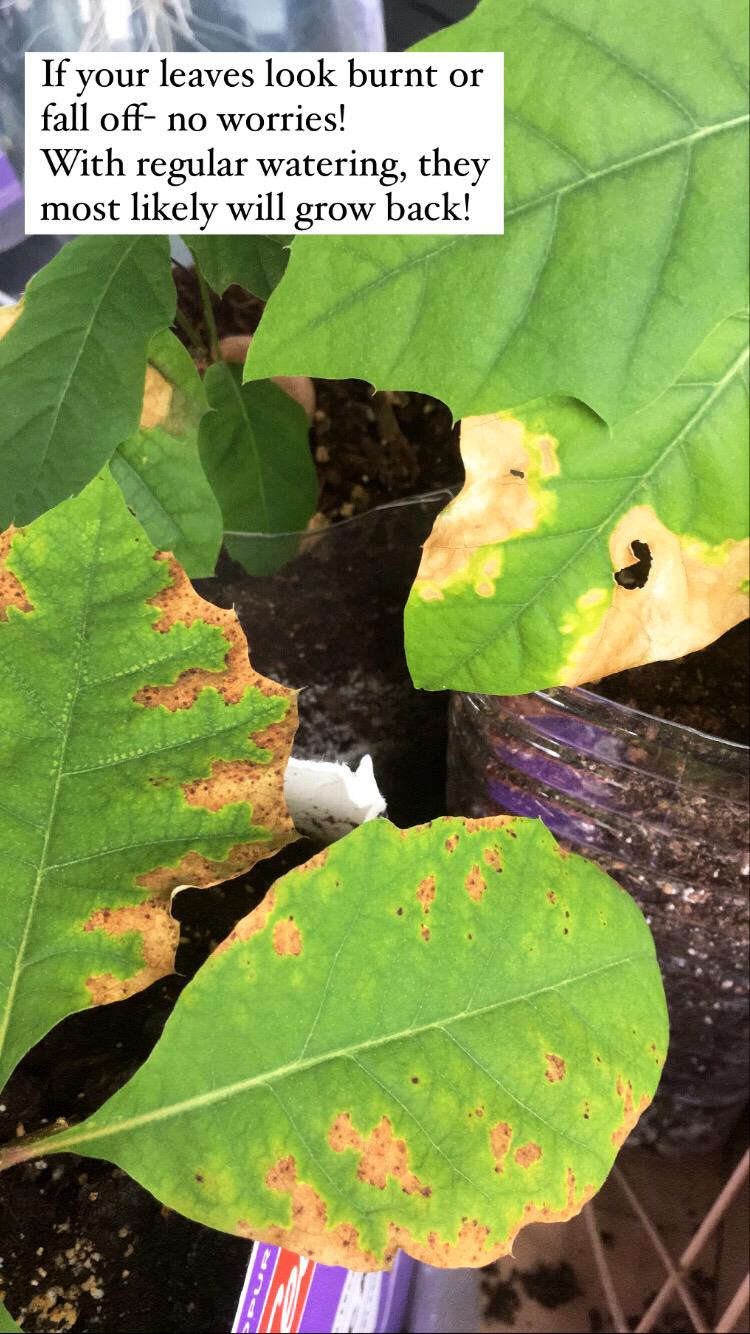
Step 8: Hardening saplings off
Has your tree grown several large leaves? This means that it is getting its energy from the sun (rather than its seed) and it is prepared to live on its own. We call trees at this stage of development “saplings”. Watch the video or follow the instructions below to learn how to transfer your oak saplings outside.
|
|
|
Vertical Divider
|
Vertical Divider
|
Vertical Divider

|
Congratulations! Now that you've prepared your sAPLINGS for the great outdoors, you can plant them in the ground. Or, if you choose, you can hold on to your sapling for another year and let it grow bigger before planting.
In the fall of your sapling’s first year, it should either be transplanted into a pot, or planted in its forever home in the Earth. If you decide to hold on to your sapling and give it a chance to grow bigger before planting it in its forever home, follow these instructions to transplant your sapling into a larger pot for winter. In the spring or fall of next year, plant your sapling in the ground using the instructions on the “Planting Your Sapling” page.
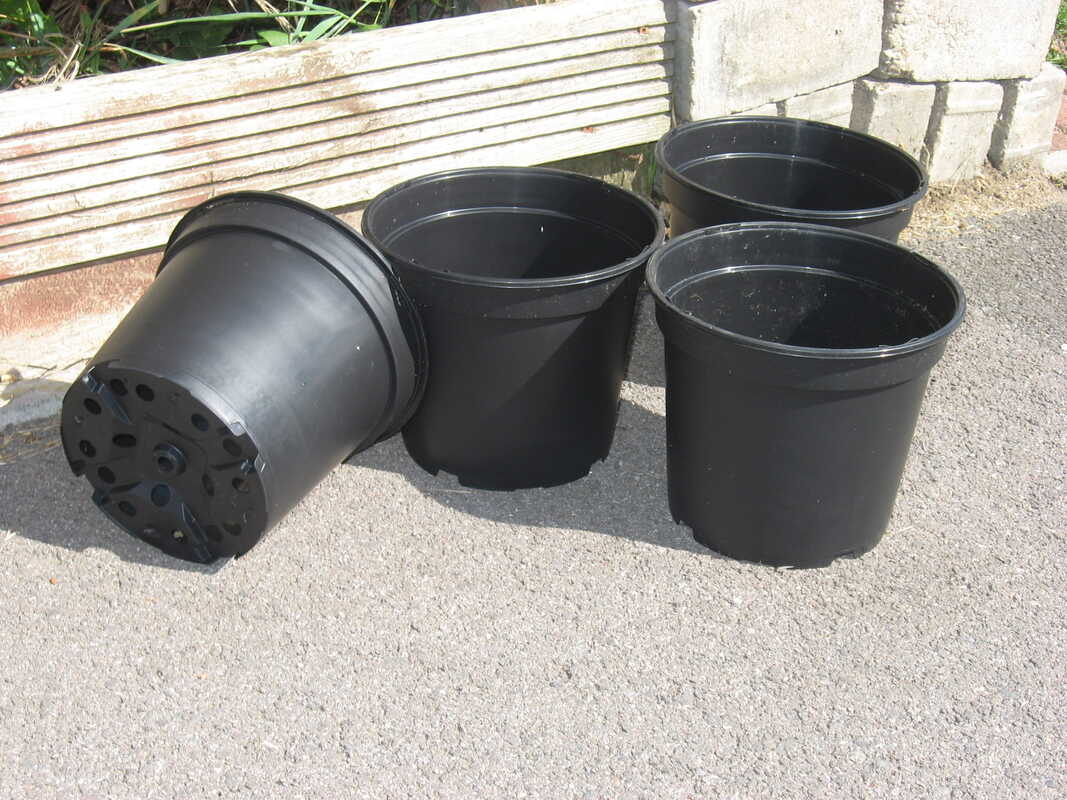
A one gallon plastic pot is perfect for your growing sapling.
Step 1: Materials
You will need:
- A 1 gallon (or larger) pot for each sapling
- Potting soil or top soil
- A clean, sharp knife (ask an adult!)
Step 2: Soil moisture
Make sure the soil in the sapling's current container is thoroughly moist, but not saturated.
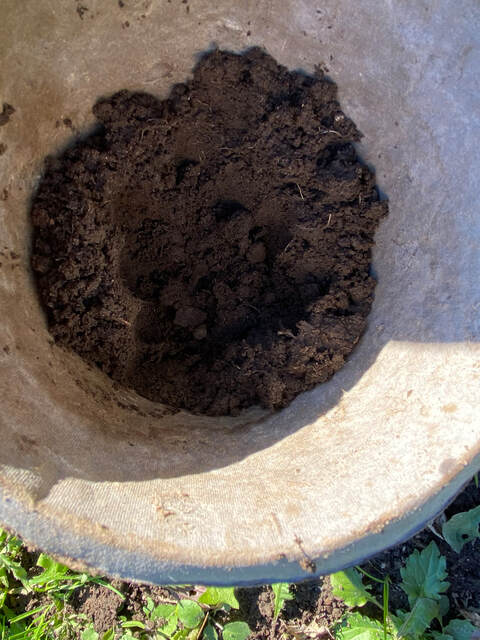
Step 3: Prepare the pot
Fill your 1 gallon pot halfway with damp soil. Pack it down lightly. Make a large, deep hollow in the centre as wide and deep as your sapling's current container.
Step 4: REmove the current container
Very carefully, cut or tear the sapling's current container away from the soil. Try very hard not to let the soil 'ball' break up (the roots should hold it mostly together). If the acorn is still attached, leave it there.
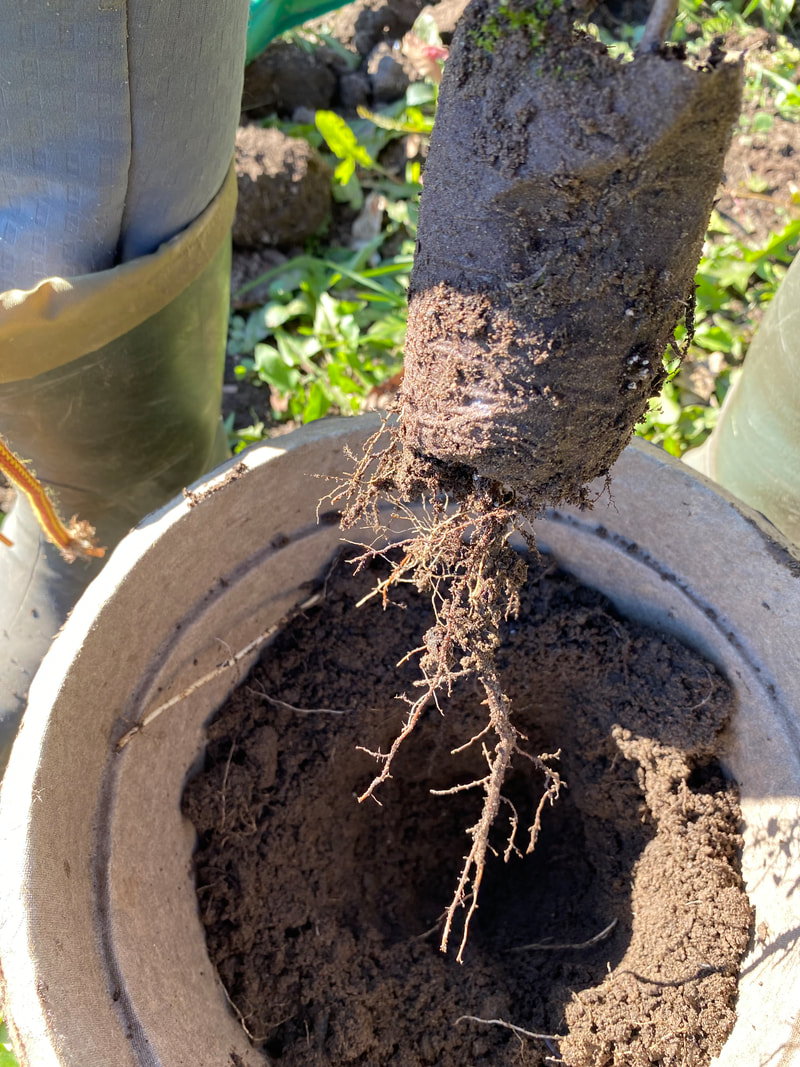
Step 5: Free the tap root
If a long tap root is coiled around in the bottom of the container, use a sharp knife to cut it off cleanly. If you are a young tree enthusiast, please get an adult to help with this step.
Step 6: Transplant
Plant your sapling in its new pot, adding soil as necessary and tamping it down carefully around the plant.
Step 7: Water
Water the newly potted plant regularly over the next couple of weeks. This will help it get over the shock of being transplanted.
Step 8: Pick an overwintering option
OPTION A: Put the pot in a cool place WHERE IT WILL NOT FREEZE under cover, or indoors (a garage could be a good option). It does not need to get light but should be lightly watered occasionally through the winter, especially if it is affected by central heating. In April, put it outdoors where it will get some light (not direct sun) and continue watering if necessary.
OPTION B: Dig a hole in the ground somewhere outdoors and sink the pot up to its rim in the soil. Cover with leaves or mulch. The soil and mulch will prevent the roots from freezing too hard. Pull back the leaves in the spring.
OPTION B: Dig a hole in the ground somewhere outdoors and sink the pot up to its rim in the soil. Cover with leaves or mulch. The soil and mulch will prevent the roots from freezing too hard. Pull back the leaves in the spring.
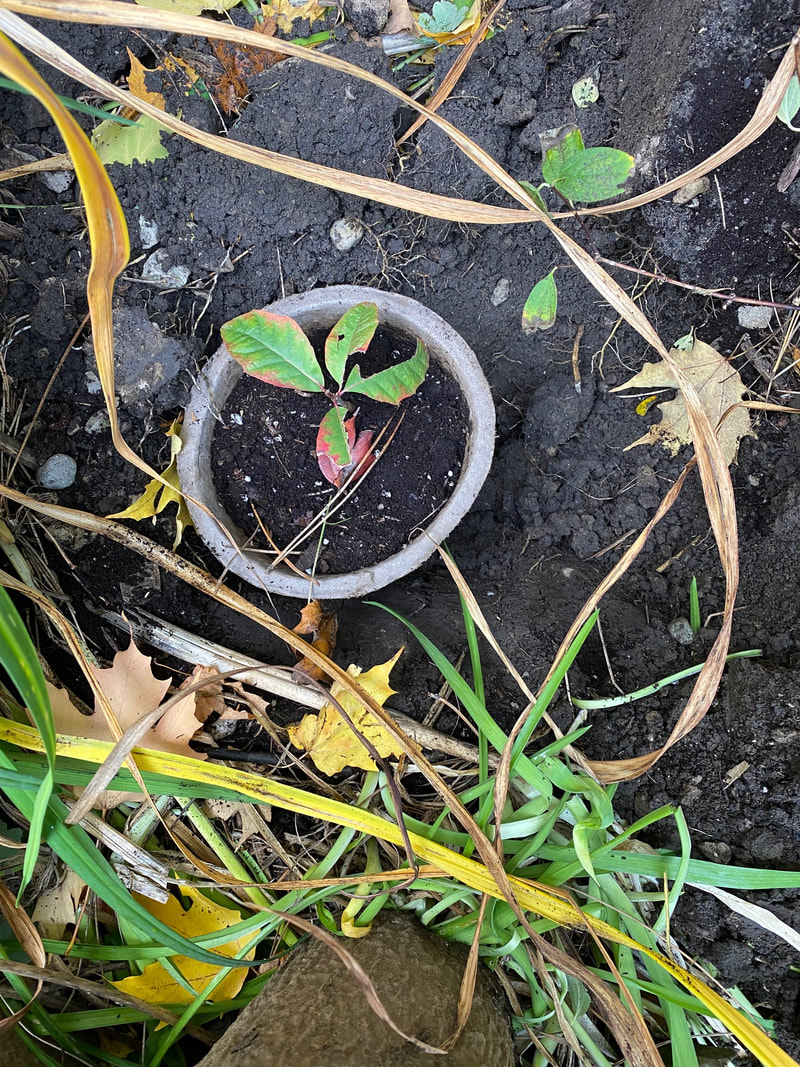
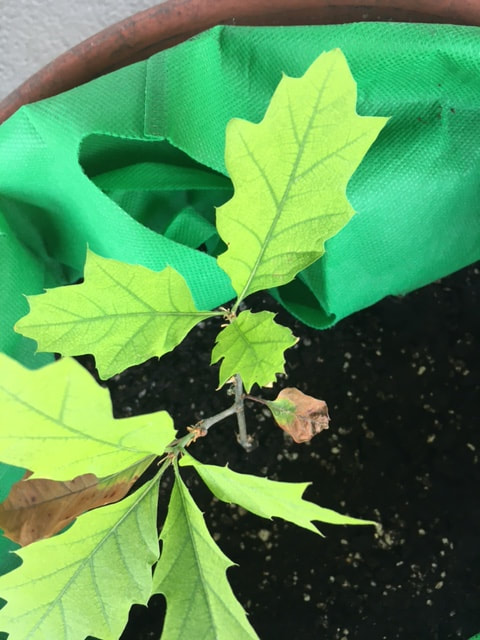
Option B - This sapling has been placed in a 1-gallon biodegradable pot and placed in the ground on the south side of a building to keep it warmer.
|
Option B - Cover the sapling with leaves to insulate it over winter.
|
Step 9: scout a forever home
Find a place where you can plant your sapling either in spring or fall. Check out the "Planting Your Sapling page" by clicking the button below for a list of suggestions. If you need help finding a home for it, let us know; we may be able to help!
|
Now that you have stratified your Sugar Maple seeds in the refrigerator for 90 - 120 days, they should be ready to grow by planting them in soil. Follow the steps below to get your maples growing!
|
|
Step 1: Materials
You will need to gather the following materials:
- Planting pots with a depth of at least 15 cm (you can use either commercial planting pots from garden stores or you can recycle old containers like 2 L milk containers or 2L plastic pop bottles, similar to what was recommended with our instructions for growing northern red oaks - just cut the top parts of the containers off with scissors and don’t forget to poke a few drainage holes in the bottom. It is up to you in terms of how many Sugar Maples you would like to try growing!
- Potting soil (can be obtained from garden stores and most large grocery chains).
- 1 large bucket (for mixing soil and water to moisten the soil).
- Your stratified maple seeds that have been in the fridge for 3 - 4 months. Some of your seeds may have already started germinating, and will have a little green sprout.
Step 2: Bucket time
Fill up your bucket with as much soil as you will need for the number of plants you plan to grow. Add a few cups of water to the soil in the bucket and stir the soil/water with a garden trowel, large spoon or stick. Once the soil has been moistened, fill up each container to about 3-4 cm from the top with moistened soil (as you fill the container with soil, occasionally tap the bottom of the container against the ground to allow it to settle).
Step 3: Make a home for your maples
Once the container has been filled with soil, poke a small hole with your finger at the top of the center area of the soil to a depth of about 1 - 1.5 cm. Place one of your stratified maple seeds into the hole you just made and cover it with loose topsoil. Repeat this procedure with as many Sugar Maple seeds as you wish (we recommend trying at least 4 in case some seeds don’t happen to sprout).
Step 4: Water and sun
Sprinkle a little water over each planted seed and then place the containers with your planted seeds near a sunny window.
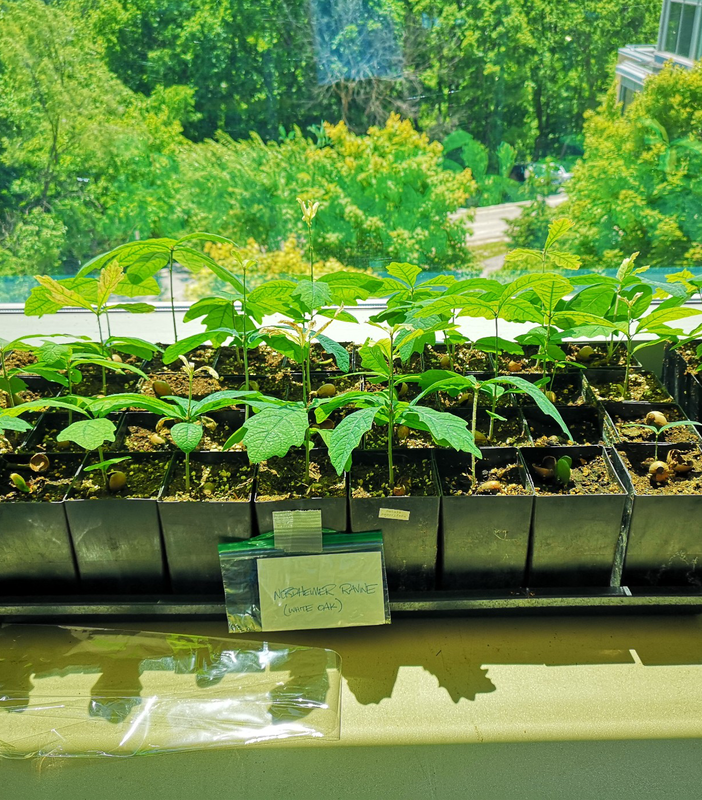
Step 5: Watch them grow!
Check every few days that the soil is moist (if it dries out, add some water). Within a few weeks, you should notice young maple plants starting to grow and poke through the soil. Continue to water them every few days. If you take good care of your young maple trees, you can grow them for up to a year in their containers, at which point, they will be ready to plant outdoors.